
 273
273
Sending Large Files
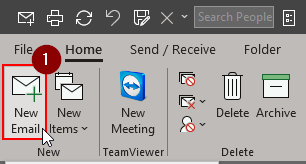
1. Compose a New Email.
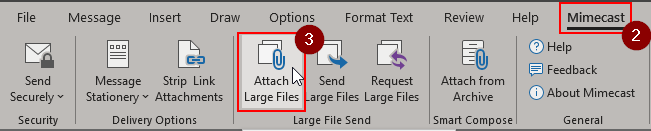
2. Click the Mimecast tab.
3. From the Large File Send group, click Attach Large Files.
4. Select the files you wish to attach. You can only upload one attachment at a time.
Note: The selected files are displayed in the message, including a notification that the attachments will be sent via Large File Send. The maximum number of attachments that can be attached to a message using Large File Send is 250. If you've have more than 250 attachments, we recommend using a ZIP archive. There is a 2 GB upload limit.
5. Finish composing the email and click the Send button within Outlook.
6. The iManage pop-up will appear, choose Send Only.
Note: You cannot "File and Send" Large File emails. You must choose "Send Only", then after the upload completes to then file the email correspondence.
7. A popup will appear to choose options for how the email is used. Adjust these according to preference, then click Send.
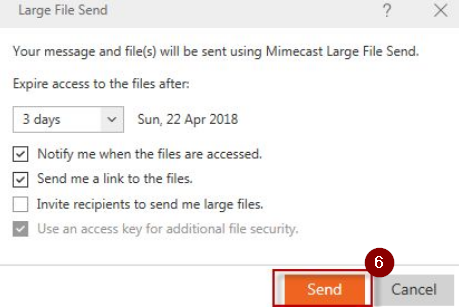
8. Once a Large File Send message has been successfully sent, a notification is displayed showing the files being uploaded, then confirming that the message was sent. You will also receive an email confirmation.
9. The recipient will receive an email with instructions to access the shared files. You will receive an email confirming that the recipient has accessed the shared files. The email notifications will be from [email protected] check the status of Sent Large Files.
Request Large Files
1. Compose a New Email.
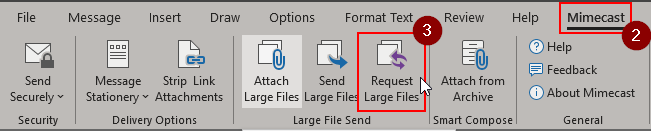
2. Click the Mimecast tab.
3. From the Large File Send group, click Request Large Files.
5. Finish composing the email and click the Send button within Outlook.
6. The iManage pop-up will appear, choose Send Only.
Note: You cannot "File and Send" Large File emails. You must choose "Send Only", then after the upload completes to then file the email correspondence.
7. Once the Request message has been successfully sent, a notification is displayed confirming that the message was sent. You will also receive an email confirmation.
8. The recipient will receive an email with instructions to upload the files. You will receive an email confirming that the recipient has uploaded the files. The email notifications will be from [email protected]
Questions? Contact Us!
IT Support Desk
![]()
![]()
Hours - 8:00AM - 6:00PM EST
Email - [email protected]
Phone - (330) 849-6699*
*For Emergency Assistance please use option 8

