
 149
149
Installation & Setup
Order link: https://ralaw.sharepoint.com/sites/IT/SitePages/Mobile-Device-Upgrade-Orders.aspx
Part 1: Download and Configure Cisco Secure Client
NOTE: Please ensure you are aware of your Apple ID and Apple Password before proceeding.
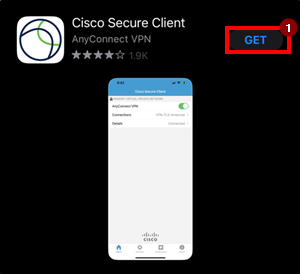
1. Go to the App Store, then search and download Cisco Secure Client.
2. Once installed, tap on the Cisco AnyConnect icon and choose OK to enable the software.
3. Within the app, tap Add VPN Connection.
4. In the Description field type Roetzel.
5. In the Server Address field type roetzel-pjpmgjrhvk.dynamic-m.com.
6. Tap on Advanced.
7. Set Network Roaming to ON.
8. Set Certificate to Disabled.
9. Tap the Advanced option in the upper left to return to the previous screen.
10. Connect with IPSec should be set to OFF.
11. Tap Add VPN Connection in the upper left to go back to the previous screen.
12. Tap the Save button in the upper right.
13. Tap the Settings icon at the top right of the screen.
14. Turn Block Untrusted VPN to OFF (on an iPad – go straight to step 4 at this time).
15. Tap the Home button at the bottom of the screen.
17. At the AnyConnect main screen, turn the AnyConnect VPN option to ON.
NOTE: While using iManage on iPad, you cannot be connected to the Roetzel or RA-Guest Wi-Fis. This will not work on the firm Wi-Fi.
Part 2: Download and Configure iManage Work 10 Mobility
1. Go to the App Store, then search and download iManage Work 10 Mobility.
2. From your iPad open the email from IT Support with the subject: ***iManage Work 10 Mobility for iPhones and iPads***.
3. Open the attached file named, Roetzel.immconfig , by tapping on the attachment , then tap More, then tap Copy to iManage Work.
4. Open the app and tap the option to Connect to: work.ralaw.com.
5. You will need to sign in including the “Ralaw\” before your username (i.e. Ralaw\jsmith).
6. You should be asked to create a PIN and whether you would like to use FaceID. If you receive a Google Analytics Disclaimer message tap No.
Installation and setup has been completed. See below of the steps of how to start using iManage on iPad.
IT - Location to this configuration file -- \\vakritnas01\ClientApps\iManage Mobile
Running iManage on iPad
NOTE: This process must be done each time you wish to use iManage on iPad
1. Ensure you are not connected to the Roetzel WiFi networks. Only use other Wi-Fi (i.e. home, hotel, etc.) or your personal hotspot.
2. Open Cisco Secure Client.
2. Tap Continue on the Untrusted VPN Server screen.
3. At the Authentication screen:
- The Group should be MFA by default.
- The Username is your windows username for Roetzel (i.e. jsmith).
- The Password is your Roetzel Network Password (it changes every 90 days or so).
4. Tap the Connect button in the upper right corner.
5. Minimize the app and open the iManage Work 10 Mobility app.
How to Use iManage on iPad
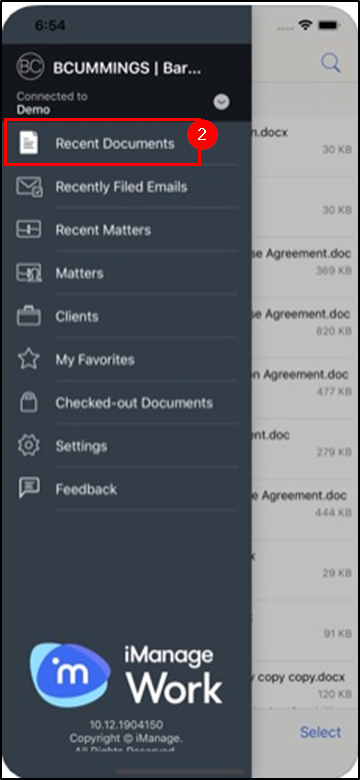
Check Recent Documents / Filter
1. Click on the List icon  in the upper left-hand corner to access the Convenience List.
2. To filter, tap Recent Documents from the Convenience List
3. Tap the Filter icon ![]() in the lower left-hand corner and tap an option.
in the lower left-hand corner and tap an option.

Performing a Search
1. To search, tap Recent Documents from the Convenience List, and tap the Search icon in the top right-hand corner.
2. Tap on one of the many search icons.
3. Tap Search.
4. The search results are displayed.
5. Tap the document from the search result and it will display.
Open/Save Attachments
1. Tap the email that contains the attachment.
2. Tap the Attachment.
3. Tap the Share icon.
4. Tap Copy to iManage Work.
5. Enter your PIN.
6. Tap Unlock.
7. Tap My Matters or Recent Matters.
8. Tap the appropriate WorkSpace.
9. Tap the appropriate Folder.
10. Tap Save & Upload New Document in this folder.
11. Rename the document if necessary.
12. Tap Save.
HP Page Lift 2
- HP Page Lift 2 is an embedded application that enables you to take a photograph of a hard copy of a document and save it as a WorkSite document.
- Page Lift provides multiple editing options, such as adding, deleting, or adjusting the order of the document pages, and you can preview the entire document before uploading.
1. Tap the iManage Work 10 Mobility app.
2. Enter your PIN.
3. Unlock.
4. Tap Recent Matters or My Matters.
5. Tap the appropriate WorkSpace.
6. Tap the appropriate Folder.
7. Tap the Plus icon in the bottom right-hand corner and tap camera.
7A. If prompted, Allow iManage Work 10 Mobility access to your camera.
8. Take a picture of the document.
9. Tap Use Photo.
10. Name the image.
11. Tap OK.
Questions? Contact Us!
IT Support Desk
![]()
![]()
Hours - 8:00AM - 6:00PM EST
Email - [email protected]
Phone - (330) 849-6699*
*For Emergency Assistance please use option 8

