Office Printers - Assigning a Default Printer

Apr 02, 2024
 58
58
Assign an Office Printer as a Default Printer
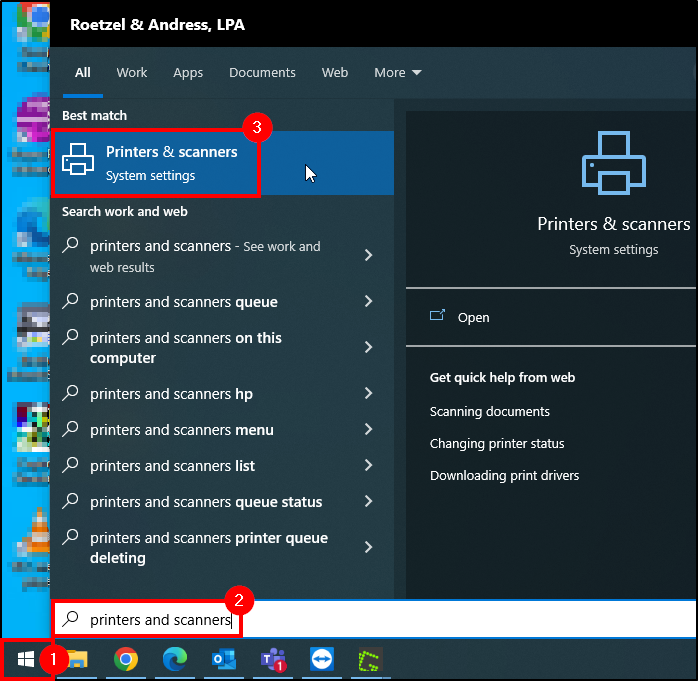
1. Click the Windows Start Button ![]() on-screen or on your keyboard.
on-screen or on your keyboard.
2. Begin typing Printers and Scanners .
3. Once typed, click Printer & Scanners .
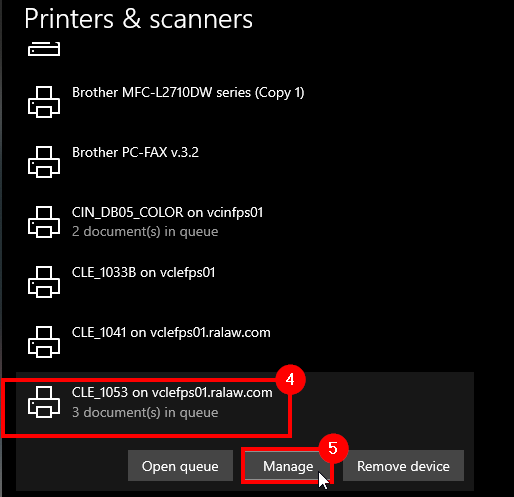
4. Select the printer you wish to make default.
5. Click Manage .
6. Click Open Print Queue .
7. A popup will appear, click Printer .
8. Then Click Set As Default Printer .
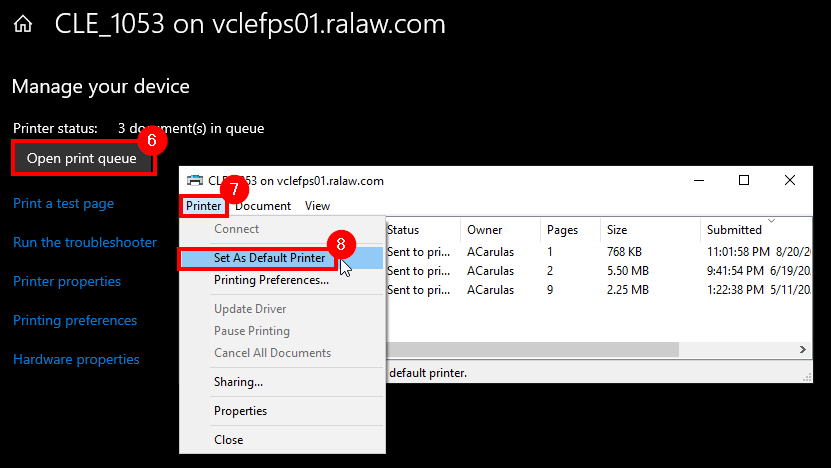
Once that has been done, all programs/browsers will use the default printer.
Note: If you are not seeing a printer listed to set as a default printer, please contact IT to have the printer drivers installed.
Questions? Contact Us!
IT Support Desk
![]()
![]()
Hours - 8:00AM - 6:00PM EST
Email - [email protected]
Phone - (330) 849-6699*
*For Emergency Assistance please use option 8

